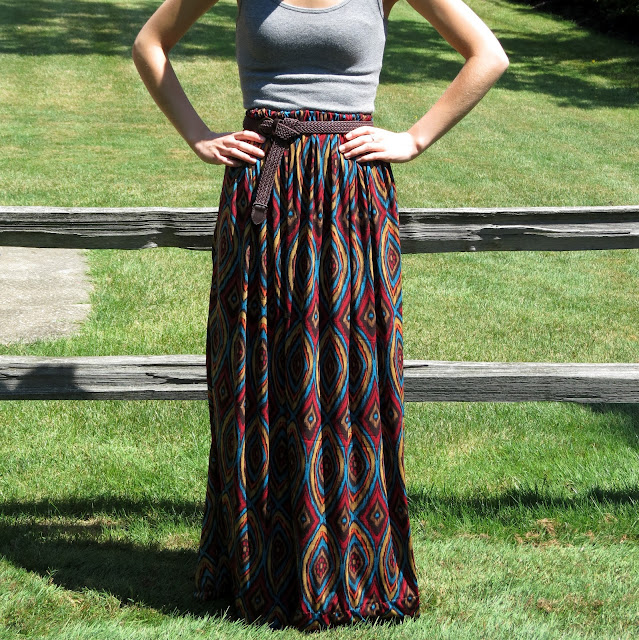
Remember when I said that the sewing machine and I are not friends? Well, that's still a very true statement, but we reconciled for just a day and I managed to pound out something truly spectacular for my severely limited abilities.
Presenting, the maxi skirt.
Bam. Sewing machine, tackled. Although, to be totally honest all I can really do is press the petal down. Looks impressive though, am I right? Wink.
So, if you're a non-sewer like me and want a super easy DIY maxi skirt, you're in exactly the right place.
You'll need: Fabric (we used a knit, and bought a yard and a half of it. But if you're taller or shorter, you'll have to measure yourself and do the math on that yourself)
A sewing machine. Any old thing will do, as long as it works.
Matching thread. If you're lucky like us you can raid your grandmother's old stuff.
Pins!
Elastic long enough to go around your high-waist.
Ready?
1. Fold your fabric right sides together so that you have a long rectangle. Pin the edge opposite the folded side. You're going to make a giant tube.
2. Sew your tube shut. I started by sewing along the white line they nice provided for me, but I sewed another one after that so the white edge wouldn't show through on the good side.
3. Pick your top edge and your hem. We're going to fit the elastic on the top edge. You're going to need enough room so that when you fold over the fabric it's enough to cover the elastic and still be tucked under so that no raw edges show.
4. Don't pin the elastic in though! Just use it to measure how far down you need to pin. If you aren't totally sure what I mean (probably because I'm the worst explainer of sewing things ever) look at the picture below. No elastic, but enough fabric that it'll fit when we put it in later. AND the bottom edge is folded under a bit so when we sew the edge down none of the raw, yucky edge sticks out.
This is an idea of how to pin it. just along the edge.
5. Okay. Now, when you sew your seam, you're going to go right along the edge where you folded the fabric under. You're making a hole for the elastic to side through! Sew along almost the entire edge, leaving just an inch or two to pull the elastic through.
6. I didn't take a picture of the elastic step, but I attached a safety pin to the one end of the elastic and worked it through the loop I made for it. Don't forget to hold onto the other end so you don't end up losing it in the middle of your skirt somewhere! When the elastic is through the entire skirt, sew the two ends together to make an elastic circle. Then you can close the hole you left open for the elastic (picture below).
7. Alright. Your top half of the skirt is finished. Time for the hem! Apparently I was inconsistent with my picture taking because I don't have a picture of the first hem I made. For the first hem, you just need to fold a little bit of the fabric over. Really the idea here is to hide the raw edge and keep the material from fraying. The second hem is much more important. This is where you're going to need to measure exactly how long you want your skirt to be. Then fold up the hem and pin it. You can either sew it with the sewing machine or by hand. I would suggest by hand. It'll be a lot harder to see once you've finished.
8. Turn it right side out, and you're all done! Now just wear your amazing maxi skirt and show it off to everyone you know!
The flexibility of a knit maxi skirt. Or, the true personality of myself.


This is great! I love the pattern on the material! Looks fantastic! :D
ReplyDeleteFrom AyeJay at http://fromlandptoenglishtea.blogspot.co.uk/